
Please follow these steps to import data into software.
A. How to import data?
These following steps are applied to QniGram software. Do similarly with other software.
Firstly, you click on Data at the bottom left corner of QniGram dialog box as shown.

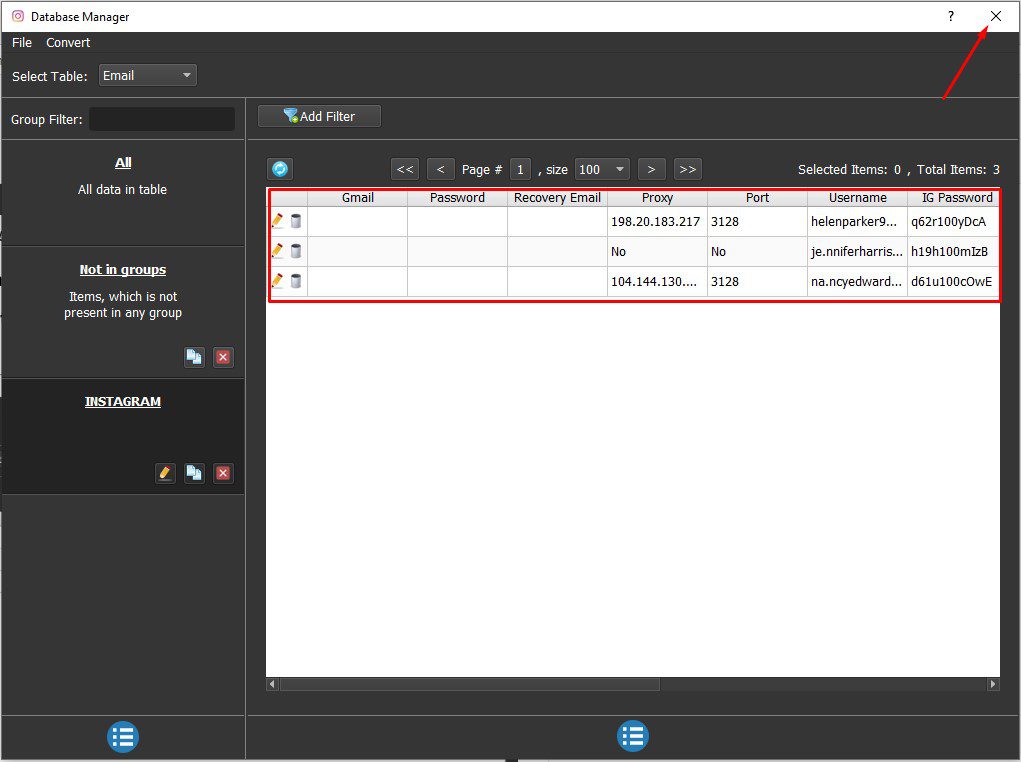
The software will display the Database Management dialog box where you will import data.
A1. Import data
There are 2 ways to import data
A1.1. Import data manually
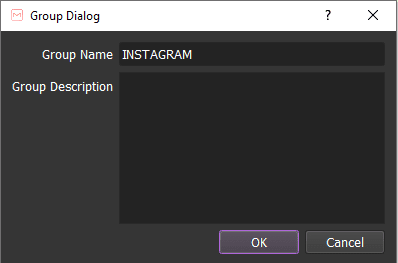
Firstly, click  on the left corner of the Database Management dialog box => Add Group => Set the group name.
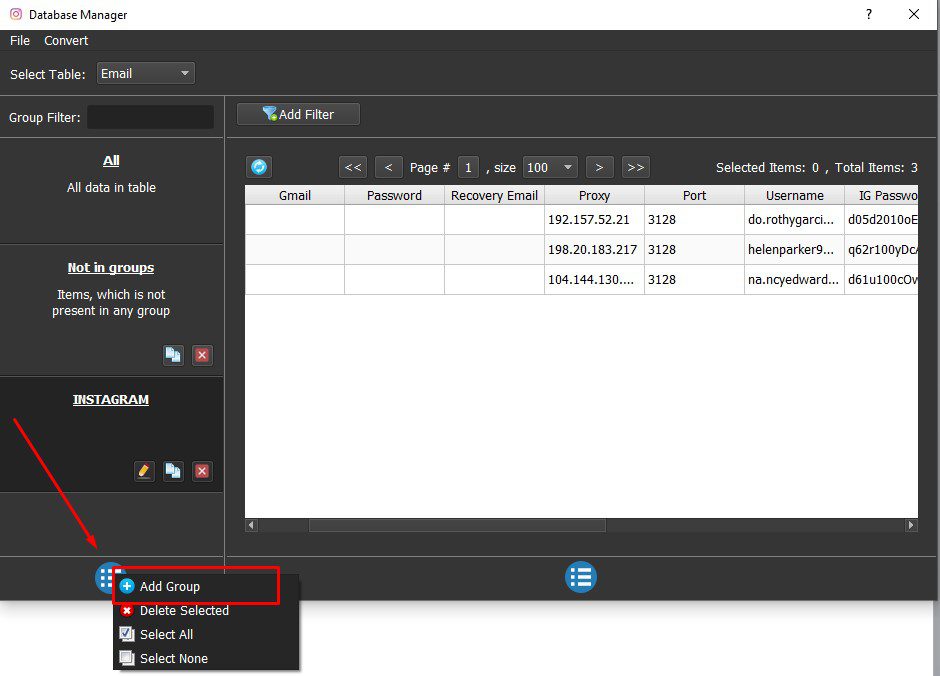
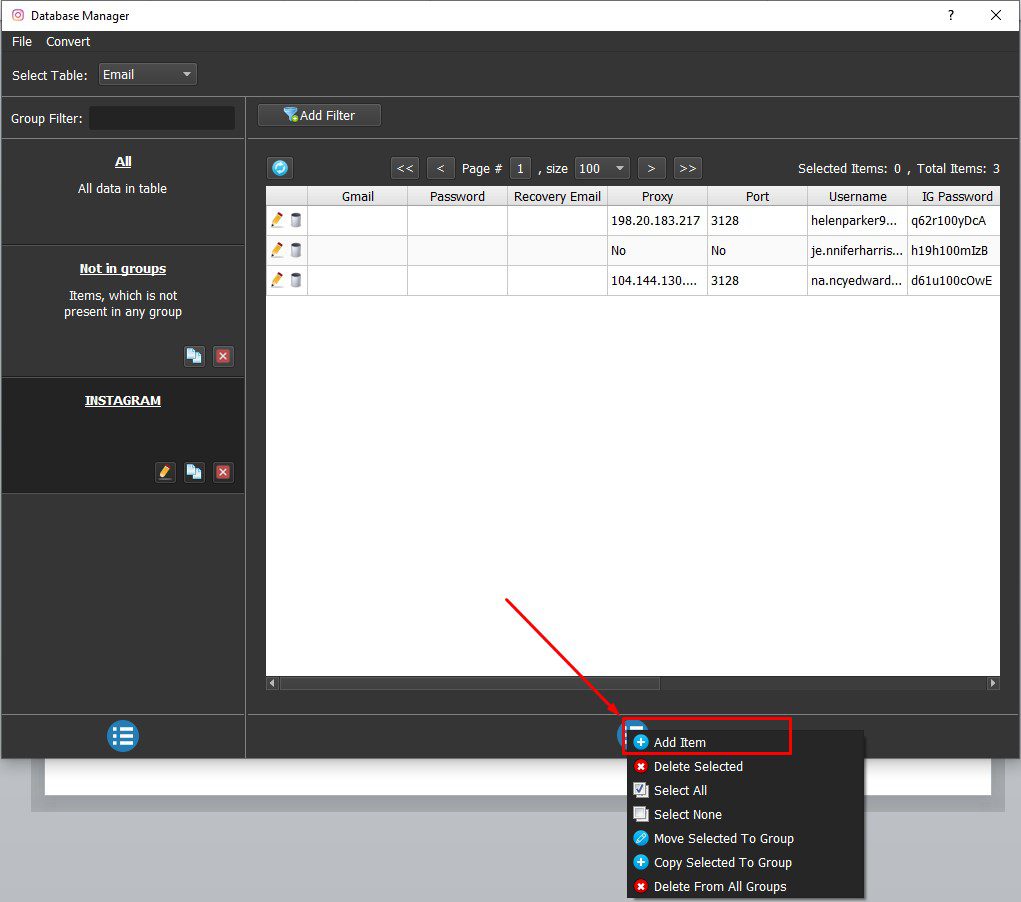
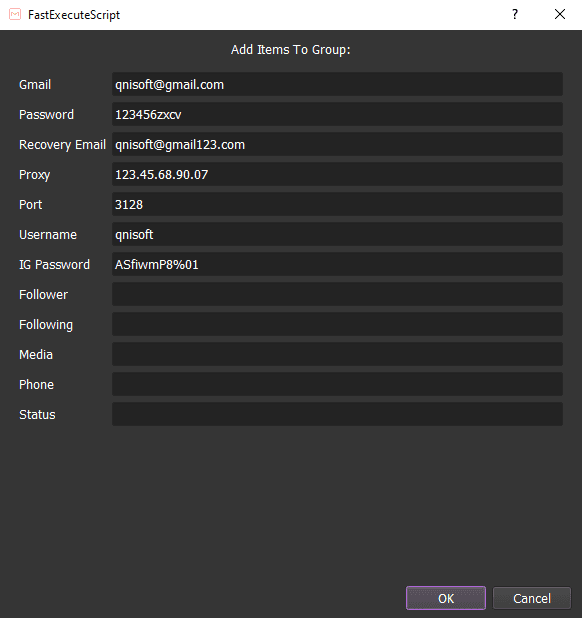
Next, click ![]() icon in the right corner of the Database Management dialog box => Add Item => Enter data of accounts into each corresponding item. Leave a blank with fields of data that you do not have.
icon in the right corner of the Database Management dialog box => Add Item => Enter data of accounts into each corresponding item. Leave a blank with fields of data that you do not have.
A1.2. Import a file
Step 1: Create an excel file containing data of accounts as Instagram Account Import Template, leave a blank with fields of data that you do not have.
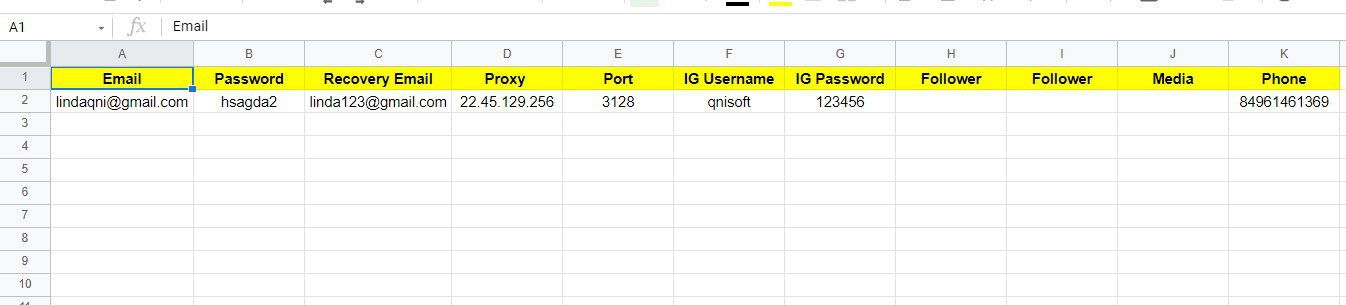
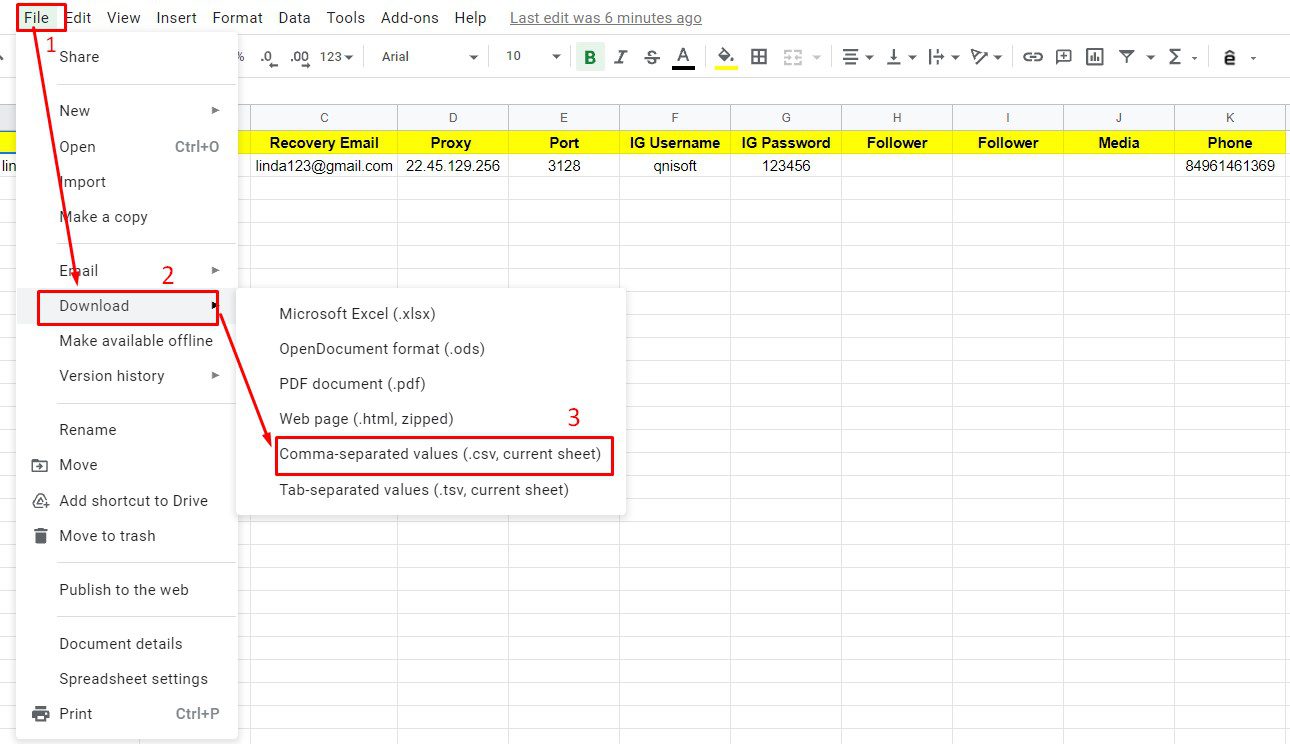
Then, download the file in CSV format as shown:
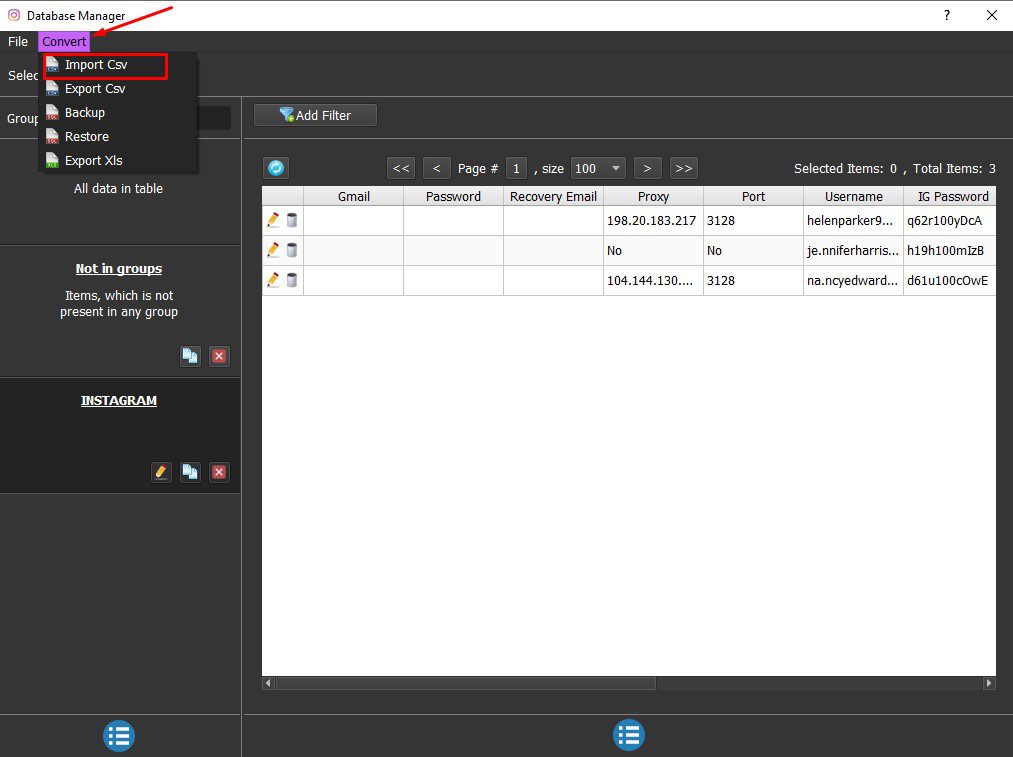
Step 2: Import data into the software
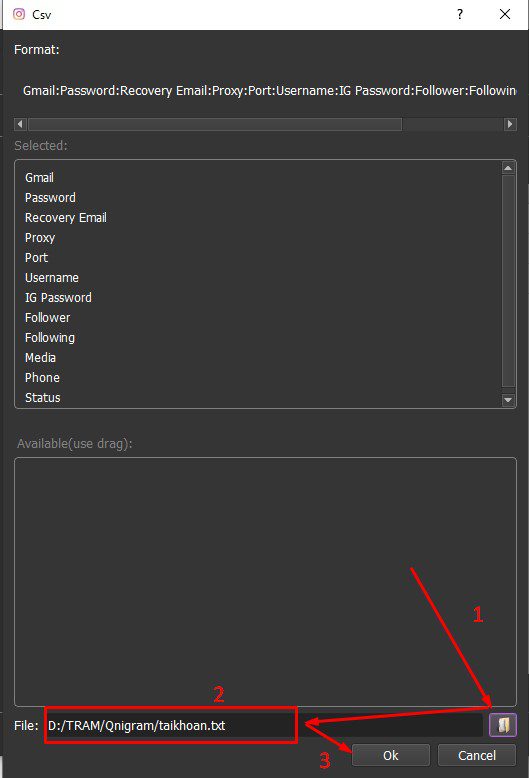
In Database Management dialog box, select Convert => Import Csv => Click ![]() => Select the dowloaded file in step 1= > Click Ok.
=> Select the dowloaded file in step 1= > Click Ok.
These imported data will be saved in CSV group, you can rename this group to remember easily (the instruction on changing name of group is specified in part B).
A2. Close the Database Management dialog box
After finishing importing data, you close the Database Management dialog box and return to the Software dialog box.
B. Tutorial on how to use the Database Management dialog box
B1. Manage groups
B1.1. Create a group
Take steps as those mentioned in A1.1 section.
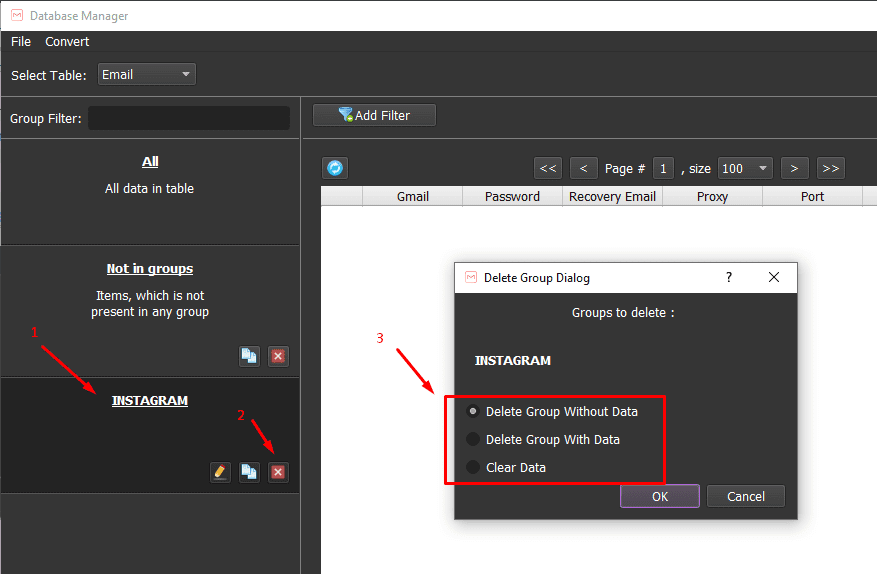
B1.2. Delete groups
Select Groups that you want to delete => Click ![]() => the Delete Group Dialog box will appear, choose one of the following options:
=> the Delete Group Dialog box will appear, choose one of the following options:
– Delete Group Without Data: delete groups, do not delete data
– Delete Group With Data: delete groups and data
– Clear Data: delete data
Finally, click OK.
B2. Add/ Delete/ Edit/ Copy/ Move data
B2.1. Add Item: add data
Take steps as those mentioned in A1.1 section.
B2.2. Delete Selected: delete data
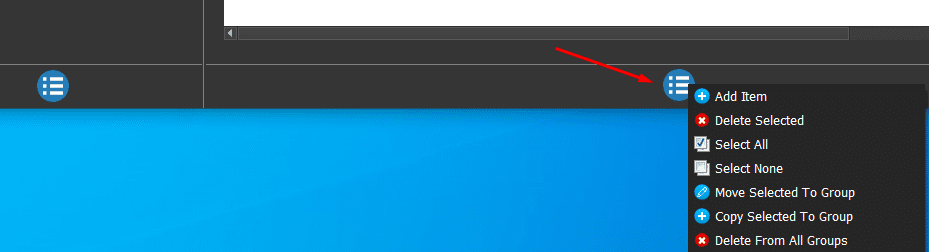
Select data/ accounts that you want to delete => Click on ![]() icon at the bottom right corner of Database Management dialog box => Select Delete Selected =>Click OK.
icon at the bottom right corner of Database Management dialog box => Select Delete Selected =>Click OK.
B2.3. Move Selected To Group: Move data to another Group
Select data/accounts that you want to move => Click on ![]() icon at the bottom right corner of Database Management dialog box => Select Move Selected To Group =>Click OK.
icon at the bottom right corner of Database Management dialog box => Select Move Selected To Group =>Click OK.
B2.4. Copy Selected To Group: Copy data
Select data/accounts that you want to copy => Click on ![]() icon at the bottom right corner of Database Management dialog box => Select Copy Selected To Group =>Click OK.
icon at the bottom right corner of Database Management dialog box => Select Copy Selected To Group =>Click OK.
B2.5. Edit Data
Select data/accounts that you want to edit => Click on ![]() icon => edit data => Click OK.
icon => edit data => Click OK.
B3. How to use the toolbars at the top left corner of the Database Manager dialog box

At the top left corner of the Database Manager dialog box, select Convert:
- Import Csv: Import data in format .csv.
- Export Csv: Export data in format .csv.
- Backup: Save data
- Restore: Restore data
- Export Xls: Export data in format .xls.
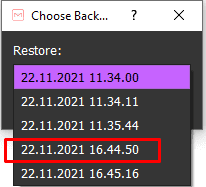
Note: In case you want to restore data, select Convert => Click Restore => The Choose Backup To Restore dialog box will appear -> Select the data file that you had saved when you click Backup.
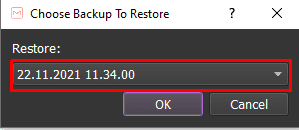
Example: 22.11.2021 16.44.50 is the time you clicked Backup to save data: at 16:44:50 on November 22nd, 2021.
These mentioned above are instructions on importing data into Data box to run QniSoft software. Hope it will be helpful.
Thank you very much.
Contact info
Email: autobotsoft@gmail.com
FaceBook: https://www.facebook.com/autobotsoftsupport
Skype: live:.cid.78c51cd4e7238ae3
Twitter: https://twitter.com/autobotsoft